Getting Started With React Router

As we know, with React we can create SPA's, where we can't navigate to different pages. Therefore to navigate from one route to another, we use React-Router(a routing library for react). There are different routing libraries like Reach-Router etc.. which does the same thing.
Why V6 ?
Because, React Router v6 is both the next version of React Router v5 but also Reach-Router it’s a coming together of all the best things from both routers in an easy to use light-weight package.
Lets Start
We will start with setting-up react-router V6 in our React App.
Run the following code to install react-router V6:
npm install react-router@next react-router-dom@next
You also need to install history from the package manager.
Run the following code to install history:
npm install history
Creating Our First Route
To create the first route using React Router library, open src/index.js file and add the following import statement:
import { BrowserRouter as Router } from 'react-router-dom';
This is the first component to import from the react-router-dom library. It is used to wrap different routes. It uses the HTML5 history API to keep track of routes history in the React app.
In the same file src/index.js wrap the App component with Router component / element.
import { StrictMode } from "react";
import ReactDOM from "react-dom";
import { BrowserRouter as Router } from "react-router-dom";

import App from "./App";

const rootElement = document.getElementById("root");
ReactDOM.render(
  <StrictMode>
    <Router>
      <App />
    </Router>
  </StrictMode>,
  rootElement
);
The <Router> element provides information about the current location to the rest of its descendants.
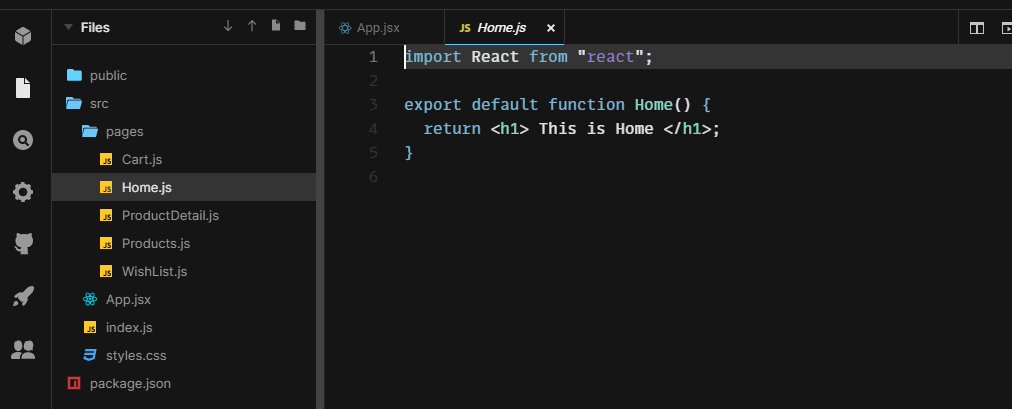
Now we'll create different components / pages to show relevant information in different pages.
In the src folder, lets couple of components & import these pages in our src/app.js file.
src/app.js
import Home from "./pages/Home";
import ProductDetail from "./pages/ProductDetail";
import Products from "./pages/Products";
import Wishlist from "./pages/WishList";
import Cart from "./pages/Cart";

export default function App() {
  return (
    <div className="App">
    </div>
  );
}
Now we'll add routes to our application. To add routes we need to import Routes from router. In the same file src/app.js write the following statement.
import { Routes } from "react-router-dom";
After importing Routes, under the app component create an element <Routes> in the same file.
src/app.js
import Home from "./pages/Home";
import ProductDetail from "./pages/ProductDetail";
import Products from "./pages/Products";
import Wishlist from "./pages/WishList";
import Cart from "./pages/Cart";
import { Routes } from "react-router-dom";

export default function App() {
  return (
    <div className="App">
    <Routes>
         // here we'll add different routes...
    </Routes>
    </div>
  );
}
To add different routes, we have to import Route component from the router & use it under <Routes> element.
import Home from "./pages/Home";
import ProductDetail from "./pages/ProductDetail";
import Products from "./pages/Products";
import Wishlist from "./pages/WishList";
import Cart from "./pages/Cart";
import { Routes, Route } from "react-router-dom";

export default function App() {
  return (
    <div className="App">
    <Routes>
        <Route path="/" element={<Home />} />
        <Route path="/products" element={<Products />} />
        <Route path="/wishlist" element={<Wishlist />} />
        <Route path="/cart" element={<Cart />} />
        <Route path="/product-detail" element={<ProductDetali />} />
    </Routes>
    </div>
  );
}
So, basically the <Route> element takes 2 props. path & element. The path is added next to the main URL of your app & it also specifies the current-route / path where the user is & the element prop takes the actual element (ex: <Home>...) & renders when the location matches its path.
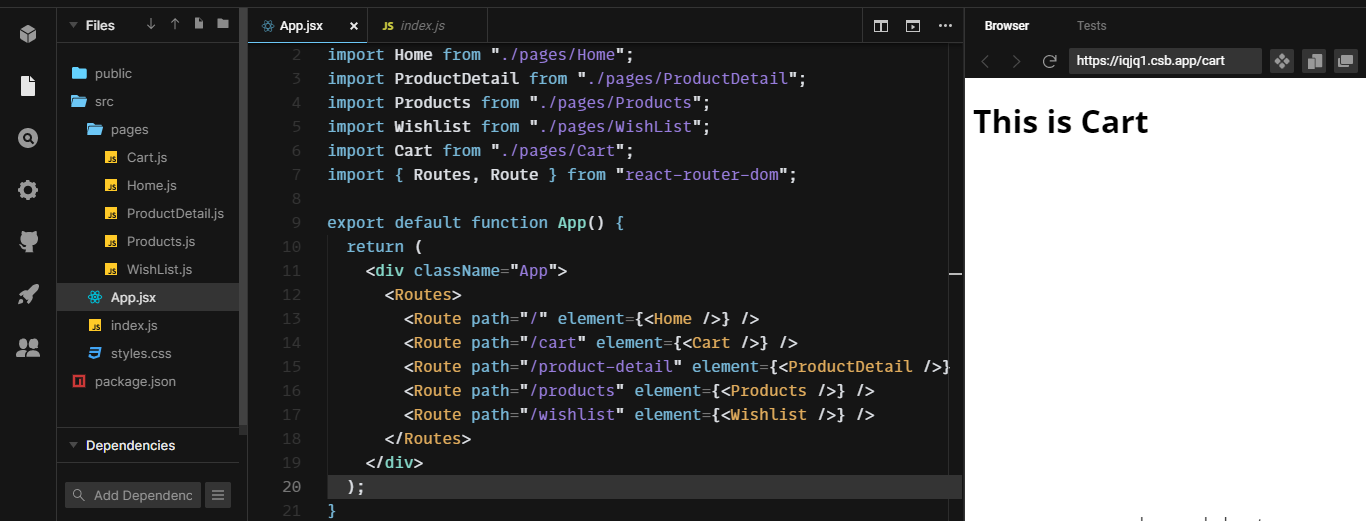 As you can see, right now I'm on the
 /cart route & the <Cart> element is being rendered on the page. This is how routing works. But, to navigate to a different route we have to specifically change the above URL. This is annoying right!, so React Router V6 provides <Link> element by which we can easily navigate to the different route.
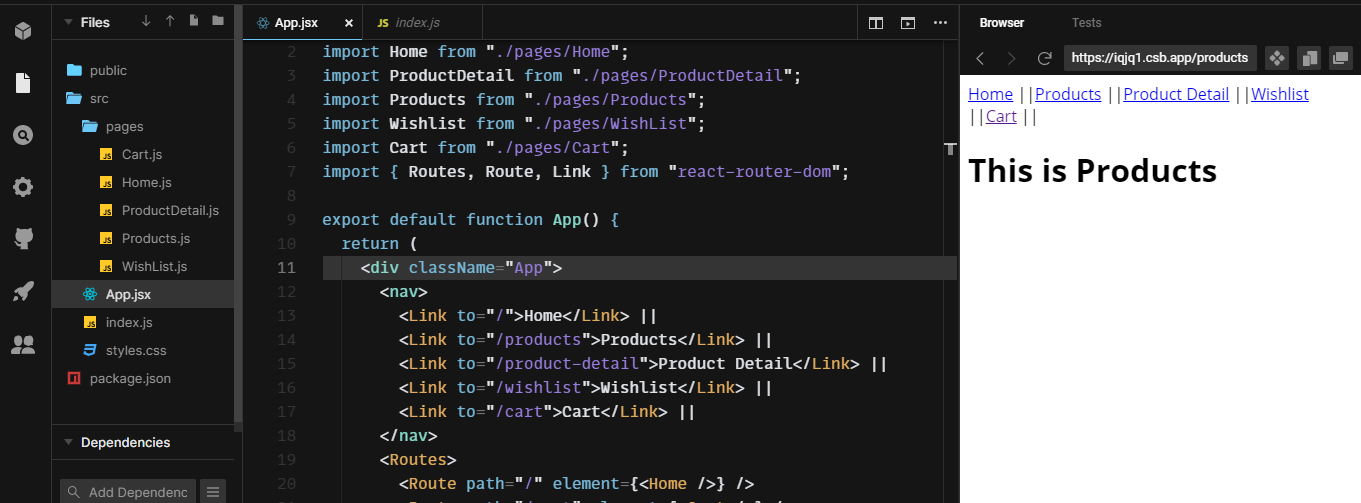
Now, import Link from react-router-dom & add the following syntax.
import Home from "./pages/Home";
import ProductDetail from "./pages/ProductDetail";
import Products from "./pages/Products";
import Wishlist from "./pages/WishList";
import Cart from "./pages/Cart";
import { Routes, Route, Link } from "react-router-dom";

export default function App() {
  return (
    <div className="App">
    <nav>
        <Link to="/">Home</Link> ||
        <Link to="/products">Products</Link> ||
        <Link to="/product-detail">Product Detail</Link> ||
        <Link to="/wishlist">Wishlist</Link> ||
        <Link to="/cart">Cart</Link> ||
    </nav>
    <Routes>
        <Route path="/" element={<Home />} />
        <Route path="/products" element={<Products />} />
        <Route path="/wishlist" element={<Wishlist />} />
        <Route path="/cart" element={<Cart />} />
        <Route path="/product-detail" element={<ProductDetali />} />
    </Routes>
    </div>
  );
}
The <Link> element takes 1 prop, to (which add to the URL), when the URL / route changes, the element associated with that route renders.
We can also add catch-all-route, which handles if the location doesn't match with the route which we define.
Add the following element under the <nav>.
import Home from "./pages/Home";
import ProductDetail from "./pages/ProductDetail";
import Products from "./pages/Products";
import Wishlist from "./pages/WishList";
import Cart from "./pages/Cart";
import { Routes, Route, Link } from "react-router-dom";

export default function App() {

function RouteNotFound() {
retrun <h1>Route Not Found </h1>
}
  return (
    <div className="App">
    <nav>
        <Link to="/">Home</Link> ||
        <Link to="/products">Products</Link> ||
        <Link to="/product-detail">Product Detail</Link> ||
        <Link to="/wishlist">Wishlist</Link> ||
        <Link to="/cart">Cart</Link> ||
    </nav>
    <Routes>
        <Route path="/" element={<Home />} />
        <Route path="/products" element={<Products />} />
        <Route path="/wishlist" element={<Wishlist />} />
        <Route path="/cart" element={<Cart />} />
        <Route path="/product-detail" element={<ProductDetali />} />
        // Catch-all-route
        <Route path="*" element = {<RouteNotFound /> } />
    </Routes>
    </div>
  );
}
Like this we can handle if the user moves to the route which we didn't define.
Active Element.
As we can see, the nav element associated with the route is not active. We have to make the nav element active if the location matches the route.
To implement this, just change the <Link> to <NavLink> element & don't forget to import it.
import Home from "./pages/Home";
import ProductDetail from "./pages/ProductDetail";
import Products from "./pages/Products";
import Wishlist from "./pages/WishList";
import Cart from "./pages/Cart";
import { Routes, Route, NavLink } from "react-router-dom";

export default function App() {

function RouteNotFound() {
retrun <h1>Route Not Found </h1>
}
  return (
    <div className="App">
   <nav>
        <NavLink
          activeStyle={{
            fontWeight: "bold",
            color: "red"
          }}
          to="/"
          end
        >
          Home
        </NavLink>{" "}
        ||
        <NavLink
          activeStyle={{
            fontWeight: "bold",
            color: "red"
          }}
          to="/products"
        >
          Products
        </NavLink>{" "}
        ||
        <NavLink
          activeStyle={{
            fontWeight: "bold",
            color: "red"
          }}
          to="/category"
        >
          Category
        </NavLink>{" "}
        ||
        <NavLink
          activeStyle={{
            fontWeight: "bold",
            color: "red"
          }}
          to="/cart"
        >
          Cart
        </NavLink>{" "}
        ||
        <NavLink
          activeStyle={{
            fontWeight: "bold",
            color: "red"
          }}
          to="/wishlist"
        >
          WishList
        </NavLink>
   </nav>
    <Routes>
        <Route path="/" element={<Home />} />
        <Route path="/products" element={<Products />} />
        <Route path="/wishlist" element={<Wishlist />} />
        <Route path="/cart" element={<Cart />} />
        <Route path="/product-detail" element={<ProductDetali />} />
        // Catch-all-route
        <Route path="*" element = {<RouteNotFound /> } />
    </Routes>
    </div>
  );
}
The <NavLink> element takes one extra prop, i.e.. activeElement in which we can add custom css, when the element is active. Also, add the end prop in the first-child or in the "/" route to implement the active css.
  <NavLink
       activeStyle={{
            fontWeight: "bold",
            color: "red"
          }}
          to="/"
      // end prop
          end
        >
          Home
        </NavLink>
Conclusion
Hopefully, this post provides you a great introduction if you are learning React Router V6 for the first time. If you are already familiar with any of the previous versions of this routing library, I hope this post gives you an overview of the changes between the previous and the latest version.
Also, if there is any mistake in the post / necessary changes to made, fell free to mention in the comment section.
References
My codesandbox link :


